Before I converted one of my magnetic bases to take plastic plates, I bought a base from Boxcar. So I was able to compare them while printing my calendar. Most pages have 2 colors, so one base is for the first color and the second I used to register the artwork in the second color to the first color. Using the transparent plastic plates with the gridded bases has made setup and registration much easier. The pictures below are for one of the pages with fairly tight registration. I put 2 registration marks on the artwork (the little crosses you see in the 2nd and 3rd pictures). I got the first color all set up (the text and calendar), then registered the flower stem and petals on the second base in the same color. Once I was done with that, I cut off the registration marks, printed the first color (violet), cleaned the press, reinked in yellow and printed using the second base. The results are in the 4th picture below.
 2 chasses |
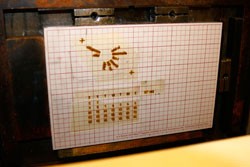 first base with haiku and calendar |
 flower to be registered against first base |
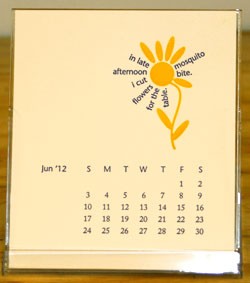 finished printed calendar page |
Beautiful calendar page, Susan — really lovely integration of image, text, and calendar. Thanks for sharing.
Ah, this is the first blog I have found that helps me at all. Thanks for pics and instructions! Love the little calendar!