First Try Printing with Plastic Plates

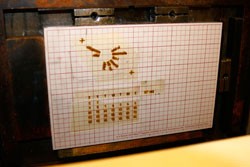
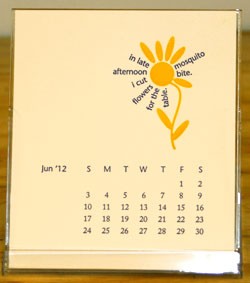
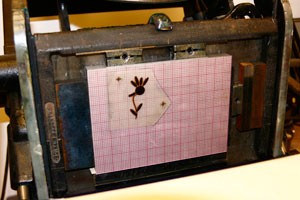
Before I converted one of my magnetic bases to take plastic plates, I bought a base from Boxcar. So I was able to compare them while printing my calendar. Most pages have 2 colors, so one base is for the first color and the second I used to register the artwork in the second color to the first color. Using the transparent plastic plates with the gridded bases has made setup and registration much easier. The pictures below are for one of the pages with fairly tight registration. I put 2 registration marks on the artwork (the little crosses you see in the 2nd and 3rd pictures). I got the first color all set up (the text and calendar), then registered the flower stem and petals on the second base in the same color. Once I was done with that, I cut off the registration marks, printed the first color (violet), cleaned the press, reinked in yellow and printed using the second base. The results are in the 4th picture below.
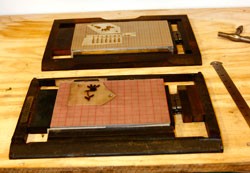
2-chasses-with-plastic-plates.jpg
2 chasses
cal-in-chasse-1.jpg
first base with haiku and calendar
flower-in-chasse-1.jpg
flower to be registered against first base
one-page-cal2012.jpg
finished printed calendar page

Magnetic Base to Plastic Plates

replacing-top-of-magnet-base.jpg
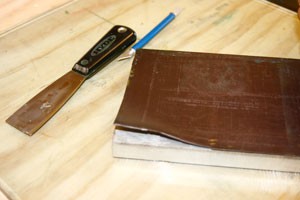
Removing the magnet top from my magnetic base

replacing-top-of-magnet-base-2.jpg
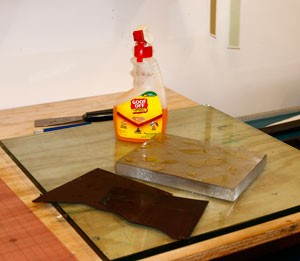
Removing the adhesive under the magnet

new-base.jpg
The converted base in my platen press chasse with a plastic photopolymer plate

When I started letterpress printing, the only way to print with photopolymer was to make steel-backed plates and then use a magnetic base to mount the plate in the press. Over time I’ve acquired 4 bases in various sizes. One nagging problem with these bases is that the magnet is weak to begin with and degrades over time so that the plates don’t stay put. I resort to tape and spray adhesive to keep the plates in register.
I’ve been making due with my weakened magnet bases, but as I started work on my 2012 calendar I knew I was going to have to get the magnets replaced or go to a plastic plate system. This system, introduced half a dozen years ago, uses adhesive to attach transparent plastic plates to an aluminum base. I knew there were lots of advantages to the plastic plates (for instance they are easy to cut using scissors and because they are transparent, you can align for registration more easily using marks on the base), but I was loath to buy new bases and replace the steel-backed plates I use to print coasters and book covers.
Then John Sullivan at Logos Graphics, who makes my steel-baked plates, told me he converted his magnetic bases to use with plastic plates by removing the magnet top and replacing it with a gridded mat he got at an art supply store. He attached the mat with the same sheet adhesive used on the plastic plates (he sells it for $3 a foot plus postage).

I used a xacto knife and metal ink spatula to take off the magnet top, and cleaned off the underlying adhesive with goof-off. Then using the sheet adhesive I got from John, I applied the gridded mat.
Some final gory technical details: One mat won’t make the base high enough and John suggested red pressboard (available from NA Graphics) but I didn’t have enough, so I adhered a second mat to the bottom of the base. It helps to have a measuring caliper to get the right height. A Boxcar aluminum base is .854″ high, my magnet converted base was .860″ before and after conversion.

Bread and Puppet

from the Bread and Puppet museumThere have been lots of things to do on my visit to Vermont, but one of the more unique was the Bread and Puppet Theater, a performance group in Glover. All summer they have performances on Friday evening and Sunday afternoons, and their museum of puppets is open every day. They bill themselves as “cheap art and political theater in Vermont.” The puppets — mostly huge and inventive heads — are quite amazing. This photo and this one give you an idea of the size of the puppets and the heads.
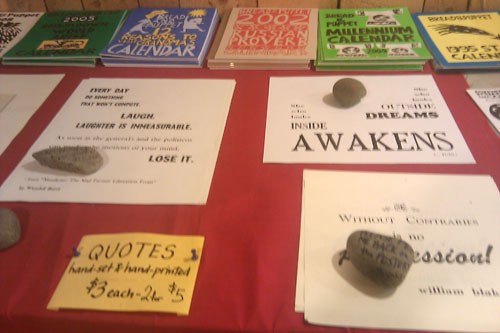
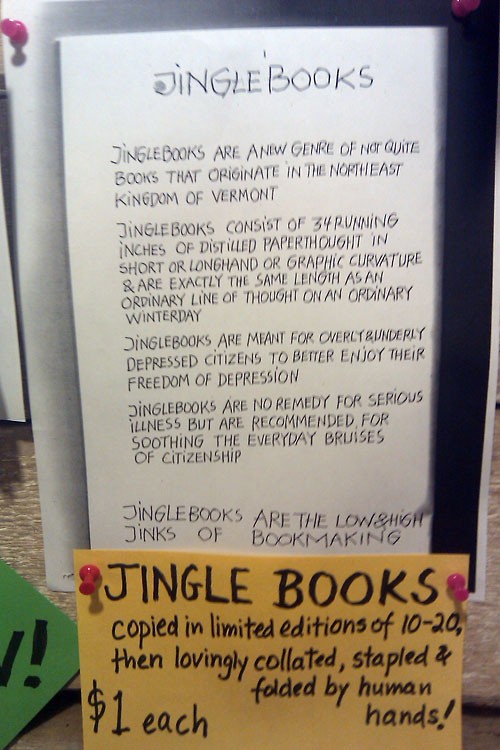
They also house a press that publishes small books (such as “how to make a papier-mâché puppet”), posters and calendars. To the left is a display in the museum of one of the puppets printing a broadside. Below is a table of their broadsides and a sign that quite nicely sums up the philosophy of their books.

Bread and Puppet broadsides

Sign for Bread and Puppet jingle books

Cyanotype

Dina Tooley — MomentIn 2001-2002, I took a year long artist’s book class at San Francisco Center for the Book. One of our assignments was to make a book that embodied a specific physical place. In rambling around her neighborhood, looking to see what place she wanted to use, one of the participants, Cyanotype ScarfDina Tooley, found an old photo-enlarging machine sitting on the side of the street. Whenever I see cyanotype blue, I think of Dina’s excitement in experimenting with the machine & the book that resulted — it’s to the right.
So a flood of memories of that class came back to me recently when I saw this tutorial for printing on fabric using sunlight. The tutorial is from Christine Schmidt’s new book Print Workshop: Hand-Printing Techniques and Truly Original Projects. (You can look through the book on Amazon.)

Tyvek Stencils

Kit Eastman’s Year of the Rabbit lunar calendarI got a note from Kit Eastman the other day. She wanted to show me her 2011 lunar calendar (to the left), a gelatin plate print made with katazome (japanese stenciling). She wrote her “use of Tyvek as a stencil material for the numbers and letters on my piece started with a post you made several years ago on tyvek as stencil.” On her blog, she’s got a post showing the stencil and printing it (there are 2 other posts on the process of making the print here and here.)
Kit’s blog is full of great pictures and descriptions of making her work. To find out the basics of katazome, she suggests looking at the how to page on John Marshall’s website.
Kit is giving away one of her lunar prints, the deadline to enter is noon on Valentine’s day, Monday 2/14. Look here for the details.