Triumph or Struggle


This past week I finished printing my pochoir and letterpress broadside. The quote is “What’s important in life is not the triumph but the struggle.”
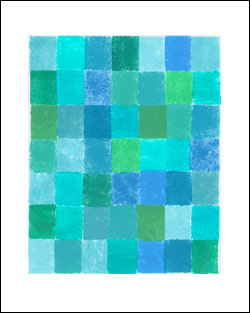
The background grid is hand stenciled with a color palette of greens and blues and the text is printed letterpress in blue/white.
This is an edition of 14.
What's important

This is what it looked like before I letterpress printed the words on top of the stenciled grid. There are 49 rectangles (a grid of 7×7) and each color is repeated 2 or 3 times.
What's important

Here’s the jig I ended up using to do the pochoir. The base is 1/4″ thick wood and I used 2 clevis pins to do the pin registration of the stencil and paper. The photo shows a page that has 5 colors already applied, with the 6th color stencil on top, ready for paint.
You can find out more about pochoir and making the jig for stenciling here
pochoir fixture

Stencil printing

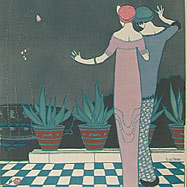
pochoir1.jpg As part of my project to design and print broadsides this year, I’ve been experimenting with different printing techniques. Right now I’m finishing off a broadside that mixes pochoir (applying color using a stencil and brush) and letterpress. Pochoir has been around since the Renaissance both in Europe and in Japan. The Japanese used the technique to color kimono fabric. Pochoir was really popular in books on interior design and fashion in the early 20th century (like the picture to the left from the Cooper-Hewitt exhibition Vibrant Visions). There’s another online exhibition from the University of Cincinnati called Art of Pochoir with more examples.

One of the most famous artists’ books is Prose du Transsibérien et de la petite Jeanne de France, with a poem by Blaise Cendrars and pochoir illustration by Sonia Delaunay from 1913.
More recently, some graffiti and street artists who use stencils refer to their art as pochoir. There’s a group of photos on flickr tagged pochoir.
For my broadside project and my first attempt at stenciling, I decided that the Delaunay or graffiti artist approach (loose registration, neatness might not count) would be a better idea than the tight registration of the fashion plates. I’ll have some pictures of the finished broadside up later this week.
pochoir2.jpg

Screen Printing

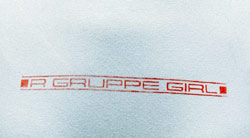
My husband and I own several vintage Porsches, and he belongs to a hot-rod Porsche club. My friend Tracey and I became members this year but the t-shirts that are available for club members start in men’s large. So I started looking around for a way to make two small women’s sized shirts for me & Tracey. I’ve made iron-on transfers in the past, but they feel heavy and tacky when I’ve applied them to fabric. I toyed with getting a gocco printer, but they are more money than I want to spend. Then on the Etsy forum, someone mentioned PhotoEZ, a method for creating a stencil using sunlight & tap water that can then be inked onto fabric . The crucial thing for me was that it allows you to make the stencil from a laser printer output.

Here’s the stencil that I made

EZScreen Stencil

And the first t-shirt (making the stencil was easy; I need practice in applying ink–Tracey’s shirt is much more evenly inked)

tshirt

There are three videos on YouTube explaining how to use the stencil kit:

Pochoir

I edit a quarterly journal called Ampersand. Last year, someone gave me all the issues of Bookways, a book-arts journal published from 1991-95. They’ve been wonderful to read. The journal was letterpress printed and is full of reviews of fine press books and poetry chapbooks. The first issue I picked up had an article by Frances Butler on the history of pochoir (stencil applied color) as well as lots of tips for using pochoir in a book or on a broadside. One of the first classes I took at SFCB, probably in 2000, was on pochoir technique, taught by Cory Reisbord. The Japanese stencil brush I got as part of the class is in my brush jar in my studio, and I’ve picked it up many times intending to try stenciling, but haven’t. Frances’ article is fascinating, and it finally got me to invent a project.

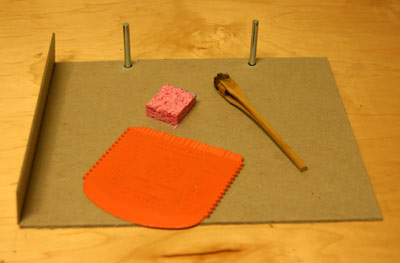
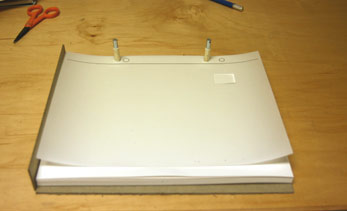
Frances describes a jig for doing an edition of stenciled prints. Using a hole punch, you punch the stencils and all the paper along the edge in the same spot. Then the paper can be inserted over pins, the stencil inserted on top, and the paint applied. For the jig, I used davey board (thick board used for book covers) and clevis pins I bought at the hardware store. You can see the jig below, along with my Japanese stencil brush (available from McClains) and two other things I’m going to try to use to apply the paint (a sponge and a rubber paint applicator). Below that picture is the stencil and paper on the jig.
Jig for porchoir

Jig with stencil & paper

After testing the jig, I realized that a single sheet of davey board was too week and too “bendy”. I’m going to remake it with two pieces of davey board.

Frances’ article is available by purchasing an issue of Ampersand.

Linoleum Block Prints

Maia’s Fish In my quest for finding appropriate printing methods for my books and broadsides, last fall I took Maia de Raat’s “Introduction to Linoleum Block Carving”, at the San Francisco Center for the Book. I’ve carved linoleum blocks before, but Maia had a set of Japanese wood carving knives that she let us try. Wow! So much easier than the cheap Speedball knives I bought at the art store. She suggested we get knives at McClains.
For the past several years, SFCB’s had a fund raiser called “Steam roller prints” where large-scale linoleum blocks carved especially for the occasion are printed using a steam roller (You can see pictures of some of the past events here. One year Maia did a print of fish (seems to be her favorite subject!)