Magnetic Base to Plastic Plates

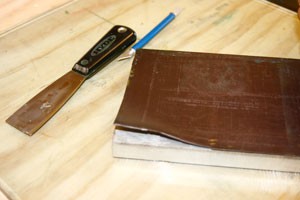
replacing-top-of-magnet-base.jpg
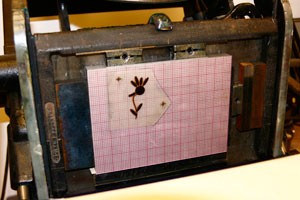
Removing the magnet top from my magnetic base

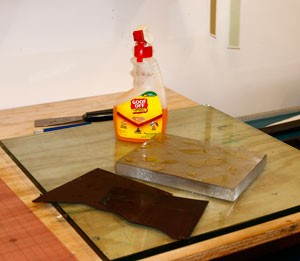
replacing-top-of-magnet-base-2.jpg
Removing the adhesive under the magnet

new-base.jpg
The converted base in my platen press chasse with a plastic photopolymer plate

When I started letterpress printing, the only way to print with photopolymer was to make steel-backed plates and then use a magnetic base to mount the plate in the press. Over time I’ve acquired 4 bases in various sizes. One nagging problem with these bases is that the magnet is weak to begin with and degrades over time so that the plates don’t stay put. I resort to tape and spray adhesive to keep the plates in register.
I’ve been making due with my weakened magnet bases, but as I started work on my 2012 calendar I knew I was going to have to get the magnets replaced or go to a plastic plate system. This system, introduced half a dozen years ago, uses adhesive to attach transparent plastic plates to an aluminum base. I knew there were lots of advantages to the plastic plates (for instance they are easy to cut using scissors and because they are transparent, you can align for registration more easily using marks on the base), but I was loath to buy new bases and replace the steel-backed plates I use to print coasters and book covers.
Then John Sullivan at Logos Graphics, who makes my steel-baked plates, told me he converted his magnetic bases to use with plastic plates by removing the magnet top and replacing it with a gridded mat he got at an art supply store. He attached the mat with the same sheet adhesive used on the plastic plates (he sells it for $3 a foot plus postage).

I used a xacto knife and metal ink spatula to take off the magnet top, and cleaned off the underlying adhesive with goof-off. Then using the sheet adhesive I got from John, I applied the gridded mat.
Some final gory technical details: One mat won’t make the base high enough and John suggested red pressboard (available from NA Graphics) but I didn’t have enough, so I adhered a second mat to the bottom of the base. It helps to have a measuring caliper to get the right height. A Boxcar aluminum base is .854″ high, my magnet converted base was .860″ before and after conversion.

Feels like Fall

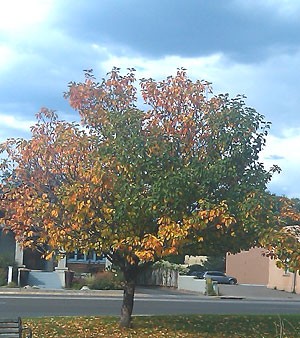
Fall in Santa FeWhen I left Vermont almost a month ago, a few trees had already turned orange & red. I certainly wasn’t ready then for summer to be over and I’m a bit sad that trees here at home are now starting to turn. My aspens are still green, but when they turn yellow I know it’s really autumn.
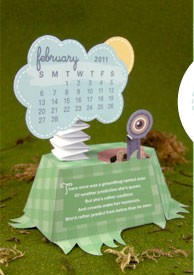
Since I spent so much time this summer away from home, as well as getting ready to leave and recovering from being gone, I wasn’t going to make a calendar. But then I started doodling around my haikus while I was away — I didn’t know about haiga yet, but I was interested in seeing if I could make some visual poetry. The upshot is I have a calendar designed, the paper is cut, and I’m just waiting for my plates to arrive in order to start printing. I should have some pages to show later this week.

Overdue Book Calendar

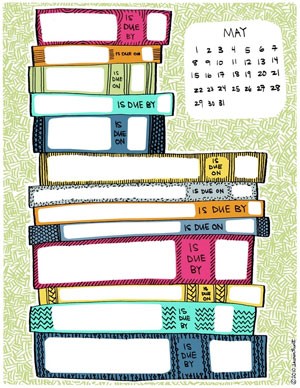
Lauren Hunt (auntjune)  2011 Overdue Book CalendarI got a kick out of this clever Overdue Book Calendar in Lauren Hunt’s auntjune Etsy store the other day. She says

Every month of this 2011 calendar has space for you to write in 13-15 library books you have checked out along with their due dates. Circle those due dates on the calendar and give yourself an extra reminder! And you can save it, to prove to people that you can read.

2011 Calendar

2011 CalendarYeah — I’m all done. Here’s my 2011 calendar…

listening around the bustle,
delighting in the commonplace—
the rest is noise.

For me, much of what makes life great is the series of simple encounters and observations I have every day — from the smell of freshly dug dirt in my garden to watching the birds at the feeder outside my bedroom to catching a glimpse of a saffron colored sky at sunset.

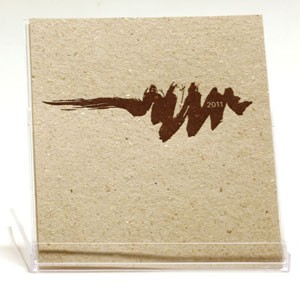
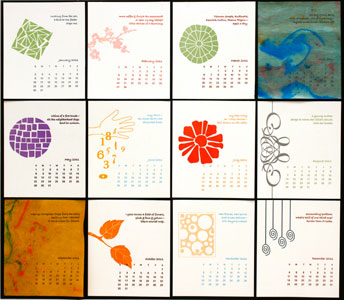
The calendar has 12 unbound cards, one for each month of 2011, celebrating those commonplace moments with a haiku and a pattern. It comes housed in a plastic case that doubles as a display stand.

Ten of the months are letterpress printed on a hand-fed (and foot treadled) vintage 1890s platen press on plush off-white cotton paper. April and September are printed on Japanense paper (moriki) and the design is hand-marbled with a technique called suminagashi. These two months are unique to each calendar. All the months are pictured below — click here to see a much larger photo. You can order a copy here.

Satisfying Day

piles of calendar pages


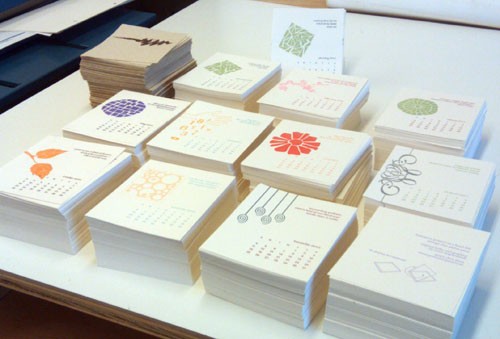
Last Thursday was a very satisfying day — on Wednesday I finished letterpress printing my calendar pages for 2011, and Thursday morning I got them all trimmed. That’s the result above. There’s more to do — there are 2 more months to print, using zazabro, old man gloom japanese paper marbling, then the pages have to be collated, put in the jewel cases, and finally I can photograph everything.
As I printed the calendar, I couldn’t help but think back on the year since printing my last one, and even more so as I finished in a week where the new chill in the air signals the oncoming Fall. Thursday was also Zozobra here in Santa Fe. That’s the day they burn “Old Man Gloom” (a 50 ft articulated puppet — that’s him to the right) to chase away the hardships and travails of the past year. You can write down your troubles on paper, and they’ll be burned up with him. It was quite a sight watching him go up in flames — it’s a 4 or 5 hour event with bands, singing, and a spectacular fireworks display — I felt quite uplifted afterward.